Showing posts with label Desserts. Show all posts

Wednesday, October 17, 2012

Pumpkin Bars

Ingredients
  • 1 cup all-purpose flour
  • 3/4 cup sugar
  • 1 teaspoon baking powder
  • 1/2 teaspoon baking soda
  • 1/8 teaspoon salt
  • 1 teaspoon ground cinnamon
  • 1/8 teaspoon cloves
  • 2 eggs
  • 1 cup (about half a can) pumpkin puree
  • 1/2 cup canola oil

Directions
  1. Preheat oven to 350
  2. In a large mixing bowl, whisk the flour, sugar, baking powder, baking soda, salt, cinnamon, and cloves.
  3. In a medium mixing bowl, lightly beat the eggs. Add cloves and pumpkin and stir till combined.
  4. Add the we ingredients to the dry and stir with a stiff spatula just until combined (there should be no streaks of flour left).
  5. Pour batter into a 8x8 baking pan
  6. Bake 30-35 minutes until a toothpick inserted in the center comes out clean

Monday, October 1, 2012

Homemade Chocolate Ice Cream Shell Topping

Wow. This is easy. And yummy. 2 ingredients! We were out of Magic Shell for our ice cream tonight, and the kids said please really nicely. We've had a jar of coconut oil in the pantry for a while (hint: it also makes amazing homemade lip balm), so I made homemade chocolate shell topping. It took less than 5 minutes, folks.

While we ate our dessert, the kids provided lots of suggestions for alternative varieties. Lets see, in the pantry we have peanut butter chips, butterscotch chips, peppermint chips, white chocolate chips...


Ingredients
  • 1 cup chocolate chips
  • 2 Tbsp coconut oil

Directions
  1. Microwave chocolate chips on 50% power in 30 second increments until melted.
  2. Stir in coconut oil (it starts solid but will melt immediately upon hitting the warm chocolate).
  3. Spoon over ice cream and enjoy.


Thursday, December 29, 2011

Review: Penzeys Apple Pie Spice

I do not typically buy spice blends for baking. I think I've been turned off by the supermarket brands that are bland and flat and offer me too little control over the ratios of the ingredients. Instead, I buy single-ingredient jars, mainly from Penzeys. I don't work for them or anything, I'm just a happy long-time customer. They do make several savory blends that we use a lot of in our house--various chili powders, their taco seasoning (far better than the packets), curries.

About a month ago, I placed one of my yearly(ish) massive orders to replenish things I'd been running low on. My box arrived with a bonus: Apple Pie Spice.  I scratched my head. I prefer to mix my own apple pie spices because I can use a blend of different cinnamons (cassia, korintje, a tad of ceylon), plus nutmeg, cloves, and a bit of mace.  I checked the ingredients: China cinnamon, Korintje cinnamon, nutmeg, mace, and cloves. I checked the color: a deep rich brown (not the cardboard-pale of the supermarket brand).

Is this where I sing, "I spiced a pie and I liked it"?

The apple pie was delicious.

Ingredients
  • Pastry for double-crust pie
  • About 2 pounds (about 8 medium) granny smith apples, peeled cored and sliced
  • 3/4 cup sugar
  • 2 tablespoons flour
  • 1 tablespoon fresh lemon juice
  • 1/3 teaspoon Penzeys lemon peel powder (or about 1 teaspoon fresh lemon zest)
  • 1 teaspoon Penzeys apple pie spice

Directions
  1. Preheat oven to 425. Place an empty cooking sheet into the oven to preheat.
  2. Line the bottom of a 9" pie plate with the bottom crust.
  3. Stir apples, sugar, flour, lemon juice, lemon peel, and apple pie spice. Arrange in the pie crust.
  4. Top with the second crust and cut vent holes (I used a mini cookie cutter to cut candy-cane shaped ones before placing over the apples). Crimp the edges.
  5. Bake on the cookie sheet at 425 about 25 minutes. Lower the oven temperature to 375 and bake about 30 minutes later.

Note that doing the two-temperature approach kept me from needing to protect the crust with foil but still kept it flaky and crisp.

Tuesday, December 20, 2011

Christmas Cake Pops


Ingredients
  • 1 box cake mix, plus the ingredients to make it.
  • 1 can frosting
  • 2 14-ounce bags Wilton Candy Melts
  • popsicle sticks
  • candy sprinkles
(I used a chocolate cake mix and chocolate frosting, but any cake mix or recipe and frosting comination that you like would be delicious!)

Directions
  1. Mix and bake the cake according to the package directions. The pan shape doesn't matter. Cool the cake completely.
  2. Break the cake into chunks and place in the bowl of a stand mixer. Blend on slow until the cake is completely crumbs. Add icing. Mix until the mixutre is uniform and has the consistency of a cookie dough. Note, you may need to do this in halves if your cake won't fit in your mixer bowl.
  3. Refridgerate the cake dough for 30 minutes or so to make it easier to handle.
  4. Line a cookie sheet with a silicone baking mat or with waxed paper. 
  5. Scoop the cake mixture by heaping tablespoons and form into small balls, about 1-2 inches in diameter. Roll with your hands to make smooth balls. Place them on the cookie sheet.
  6. Refridgerate or freeze the cake balls at least 30 minutes.
  7. Melt a small amount of candy melts (about 1/2 cup) in the microwave until smooth and creamy. I use 30-45 second intervals on 50% power, stirring in between. A double boiler might go faster, or maybe not.
  8. Dip the end of each popsicle stick into the melted chocolate and then insert into the cake ball, pressing all the way through to the cookie sheet.
  9. Refridgerate or freeze the cake-balls-on-stick for 30 minutes or until the chocolate is firm and the sticks are stuck.
  10. Melt the remaining candy melts according to the directions. You might want to do this in two-to-four batches. I used two different colors, and did each color in two halves.  30 second intervals at 50% power until the chocolate is smooth and runny.
  11. Dip the cake end of each stick into the chocolate, evenly coating the cake center. Use a spoon and/or spatula to help ensure even coverage, and twirl slowly and/or tap to remove any big drops.
  12. While the chocolate is still wet, shake sprinkles on the pops.
  13. Place the pops, stick-side down, in a block of styrofoam that you have covered with plastic wrap, to dry. A stiff cardboard box with small holes punched in it works also.

Sunday, October 9, 2011

Pumpkin Spice Cupcakes

This is the weekend for pumpkin in this house. This morning's treats are cupcakes destined for our kids' school fall fair. I iced these with a plain white icing into which I'd stirred some red and yellow food coloring. They would be just as tasty plain as they are nice and moist.

Note that both today's cupcakes and yesterday's pancakes each took 1/2 cup of pumpkin puree, leaving about 1/2 cup left in the can. Guess I have more baking to do...

Ingredients
  • 2 cups all-purpose flour
  • 1 1/2 teaspoons baking powder
  • 1/2 teaspoon baking soda
  • 1 teaspoon cinnamon
  • 1/4 teaspoon nutmeg
  • 1/4 teaspoon cloves
  • 1/4 teaspoon ginger
  • 1/4 cup (1/2 stick) butter, softened
  • 1/4 cup shortening
  • 1 1/2 cups sugar
  • 1/2 teaspoon vanilla
  • 2 eggs
  • 1 cup buttermilk
  • 1/2 cup canned pumpkin

Directions
  1. Preheat oven to 350. Line 24 muffin cups with paper cupcake liners.
  2. In a medium bowl, whisk the flour, baking powder, baking soda, and spices. Set aside.
  3. In a small bowl, whisk the buttermilk and pumpkin.
  4. Fit a stand mixer with the paddle attachment (I have the Side Swipe, which I dearly love). Beat the butter, shortening, and sugar on low until well blended.
  5. Add the eggs, one at a time, to the butter/sugar mixture and beat well. Add the vanilla.
  6. Add about half of the dry ingredients to the mixer and beat until incorporated (about 15-20 seconds). Then add about half the buttermilk/pumpkin mixture and beat. Repeat with remaining dry and milk mixtures.
  7. Scrape down the bowl. Turn the mixer to medium and beat 1-2 minutes.
  8. Distribute among the 24 cupcake liners.
  9. Bake 18-22 minutes until a toothpick inserted in the center comes out clean.
  10. Cool on a wire rack about 5 minutes then remove from the pan and cool completely.
  11. Ice if desired and serve.

Wednesday, June 22, 2011

Strawberry Trifle

This dessert is pure summertime, down-home comfort food that tastes heavenly in an artificially-red with "whipped topping" kind of way. This is not a fancy dessert, nor is it a heavy dessert (though if you swapped the angel food for pound cake, added sugared Jello and real sweetened dairy whipped cream, it could be a heavy dessert).

I will tell you a secret. The bulk of this dish was prepared in a giant round cake-carrier turned upside down (in lieu of a picnic-safe trifle dish). And it looks messy. Like my 6-year old made it with help from her 4-year old brother. Except they weren't involved.

The four pretty-looking dishes in the photo were wedding gifts from (ahem) years ago, and I tried really hard to make them look less gloppy than the big batch.Oh well, it was tasty, which is far more important than pretty.

Ingredients
  • 1 box angel food cake mix
  • 1 large box sugar-free strawberry-flavored Jello (the 8-serving version)
  • Approximately 16 oz strawberries, fresh or frozen
  • 1 12-oz tub of lite Cool Whip

Directions
  1. Bake the angel food cake according to box directions. Or, you could buy a pre-made one. Or go all Martha Stewart and bake from scratch. For me, I'll spend the $1.25 for the mix plus 1 1/4 cups water rather than $6 for the bakery version or $3 for a dozen eggs when all you need are the whites. Score one for being frugal and lazy at the same time.
  2. Mix the jello according to the speed-set directions (Boiling water followed by ice water. Sure I could repeat it, but its printed right on the box....).
  3. Pour half of the un-set Jello into a large bowl and stir in about 3 cups of strawberries, unfrozen*. Reserve some strawberries for the top of the cake. You can slice them or leave them whole--I left mine whole (and frozen..see my note at the bottom about that).
  4. Gently stir about half of the Cool Whip into the remaining Jello. The Cool Whip totally deflated for me, but I got a tasty strawberry-flavored cream out of it. Place both Jello bowls into the fridge to set for about 15 minutes.
  5. Break the cake into about 1" cubes. Note I say break and not cut. Go ahead and try to slice an angel food cake. I failed even with slow slices and a sharp serrated knife, so I just tore it to bits with my bare hands.
  6. In the bottom of your trifle dish, spread an even layer of cake pieces. Top with about half of the Jello/Cool Whip and then about half of the Jello/Fruit. Layer on more cake, pink Cool-Whip, and Jello. Top with your reserved strawberries. Top again with the remaining un-adulterated Cool Whip.
  7. Chill (or freeze) and serve.

*Note about frozen strawberries. If you pour un-set Jello over frozen strawberries, the Jello will set. Like immediately. Handy tip if you're making Jello for dessert in a jiffy. Not so handy when you want it to be a soft-set saucy layer for your trifle. Luckily, my strawberry Cool Whip layer was extra saucy.

Sunday, June 12, 2011

Smores Gone Wild

I don't trust my kids around a campfire, so we make our smores in the microwave. They are super-fast and super-easy and there are so many variations.

Basic Smores:
  1. Place a graham cracker square on a napkin or microwave safe plate.
  2. Place a large marshmallow on top.
  3. Nuke 10 seconds.
  4. Top with a square of chocolate and another graham cracker square.

Variatons:

Peanut Butter Cup Smores - Add a swipe of creamy peanut butter to the top cracker. The residual warmth from the marshmallow will melt the chocolate and the peanut butter together. mmmm...maybe Reese's should consider adding marshmallows to their candies...

Fluffer Nutter Smores - Graham crackers, marshmallow, peanut butter, and banana slices (chocolate optional).

Dark Chocolate Raspberry - Change out the plain milk chocolate for a Dove Dark Chocolate promise and add a swipe of raspberry jelly

Double-Stuffed Smores - Chocolate graham crackers with marshmallow and white chocolate

Chocolate Orange Smores - Chocolate graham crackers, marshmallow, orange marmelade

Turtle Smores - Chocolate graham crackers, marshmallow, pecan halves (stick them into the hot marshmallow to keep them from falling out),  a square of chocolate, and a thin swipe of caramel ice cream topping on the top graham.

You tell me: what kinds of smores do you like?

Thursday, June 9, 2011

Two Way Cocoa Oatmeal M&M Cookies

Many drop cookie recipes can easily be made into bar cookie recipes just by baking them in a cake pan instead of on a cookie sheet.

These are a sweet take on oatmeal cookies, with peanut M&M's for sweetness, crunch, and just a touch of protein. The cocoa flavor is good but not overpowering. I won't go so far as to say they're healthy, but the oatmeal makes me feel better about serving these after school :)

Ingredients
  • 1 1/2 cups all-purpose flour
  • 1/4 cup cocoa powder
  • 1/2 teaspoon baking powder
  • 1/2 teaspoon salt
  • 1 cup (2 sticks) butter, softened
  • 1 cup packed brown sugar
  • 1 cup sugar
  • 2 eggs
  • 3 cups quick-cooking oats
  • 2 cups peanut M&M's (about 2/3 of a bag)
Directions
  1. Preheat oven to 325. If you are making bar cookies, grease a large cake pan. If making drop cookies, line two cookies sheets with parchment or silicone liners. (I did both, so I greased a 8" square baking pan and lined a cookie sheet).
  2. Whisk flour, cocoa powder, baking powder, and salt in a bowl.
  3. Fit your stand mixer with a silicone-edged beater and blend butter and sugars. Add eggs one at a time, beating about 30 seconds on medium in between.
  4. Slowly add the flour mixture and beat until well combined. Add the oats in several batches. If you don't have a nifty SideSwipe beater, remember to turn off the mixer and scrape down your bowl every now and then.
  5. Add the M&M's last and beat just until they are distributed (without the nifty beater, I suggest doing this by hand with a stiff spoon).
  6. Spread dough evenly in the greased pan, or drop by generous (palm-sized) balls onto a cookie sheet.
  7. Bake individual cookies about 22 minutes. Bars will take about 5-8 minutes longer.

Sunday, June 5, 2011

Apple Cobbler for Two

I don't always cook gargantuan proportions of everything. Really. This apple cobbler recipe could easily be doubled or tripled. Or halved, though as-is it could be a  hearty dessert or breakfast treat for just one person. We ate ours for breakfast with yogurt. In retrospect I should have cooked some sausage too because the spicy meat would be a good compliment to the sweet syrupy cobbler base.

The secret to making this easy to make and easy to size up-or-down is by using frozen roll dough (like Rhodes).  Once the dough is thawed, the total prep time on this dish is extremely short--how fast can you peel an apple?

Ingredients
  • 2 frozen dinner roll dough balls (such as Rhodes)
  • 1 small granny smith apple, peeled and chopped into 1/2 inch cubes
  • 2 tablespoons brown sugar
  • 1/4 teaspoon cinnamon (a couple of shakes..I never measure cinnamon in such small amounts because you can't really add too much here)
  • dash nutmeg
  • 1 tablespoon butter, chopped into 1/4" cubes
Directions
  1. Thaw roll dough according to package directions. I put it in the fridge overnight and then finished the job in a barely warm oven for about half an hour in the morning.
  2. Preheat oven to 425.
  3. In a (very) small casserole dish or ramekin, add chopped apples, brown sugar, cinnamon, and spices. Stir.
  4. Sprinkle all but one or two of the butter bits over the apples.
  5. Cut a small cross in the top of each roll to encourage them to spread out a bit. Place one small dot of butter into the center of each cross (so that the butter soaks into the dough as it bakes.
  6. Bake approximately 20 minutes until the apple filling is hot and bubbly and the bread topping is lightly golden brown.
  7. Cool for 5-10 minutes and serve. (With breakfast, or with a scoop of ice cream for dessert, or as a side dish with a country fried steak....)

Saturday, June 4, 2011

Thin Mint Ice Cream

Yes, I do mean those Thin Mints. It started with a picnic lunch for my daughter's field day. I packed a roll of thin mints (the Girl Scout kind) for a dessert, and we didn't finish them all. The remaining ones sat in the cooler long after the cooler had given up its cooling. When I unloaded at home, I had a baggie of slippery melted cookies. So I put them in the freezer to firm back up. Then I had one solid hunk of chocolate-covered cookie. And since they were already frozen, I thought about breaking them up and sprinkling over ice cream. Then I realized it would be more fun to sprinkle them into ice cream.

This recipe makes about 1 quart of ice cream and you will need an ice cream maker.

Ingredients
  • 1 1/2 cups milk
  • 1 1/2 cups heavy cream
  • 3/4 cup sugar
  • 4 large egg yolks
  • 1 teaspoon peppermint extract
  • 8 thin mint cookies, crushed

Directions
  1. Whisk milk, cream, 1/2 cup of sugar in a sauce pan over medium heat. Stir and warm until the sugar is dissolved and the mixture reaches about 175 degrees.
  2. In a separate bowl, whisk the egg yolks and remaining sugar.
  3. Temper the eggs by slowly whisking about 1 cup of the hot milk mixture into the eggs (off the heat so you're not scrambling the eggs!). Then slowly whisk the egg-milk mixture back into the saucepan with the remaining cream.
  4. Cook over medium heat until hot but not simmering (about 180).
  5. Strain the cooked ice cream with a fine mesh strainer into a bowl. Cool over ice about 10 minutes and then refrigerate until cold (several hours or overnight).
  6. Follow your ice cream maker instructions for freezing the ice cream. Just before the ice cream is finished, with the machine running, add the peppermint extract and cookies.

Sunday, May 29, 2011

Semi-homemade Black Forest Cake

Ingredients
  • 1 chocolate cake mix (plus ingredients as specified on the box)
  • 1 can cherry pie filling
  • 2 cups heavy whipping cream
  • 4 tablespoons powdered sugar
  • 1 tablespoon triple sec*
  • Fresh cherries
  • 4 ounces dark chocolate (e.g. Hershey's Special Dark), grated. (Grate with a food processor or a box grater and chill until ready to use).
Directions
  1. Prepare cake according to package directions in two 9" round cake pans. Remove from the pan and cool completely on a wire rack
  2. For the whipped cream icing:
    1. In a cold bowl, begin whipping cream with an electric mixer.
    2. Add sugar and triple sec.
    3. Continue whipping until the cream is firm. Keep chilled until ready to use.
  3. Place one cake layer on the serving plate or a cardboard cake circle. If you are assembling directly on your serving plate, I suggest sliding strips of foil or waxed paper under all the edges to catch drips and keep your plate clean.
  4. Spread with a thin layer of cherry pie filling. Spread a thin layer of whipped cream over the filling.
  5. Top with the second cake layer.
  6. Ice top and sides with the remaining whipped cream.
  7. With cold hands carefully press grated chocolate around the outside edges of the cake. This is a messy process. And warm hands melt the chocolate shavings. Trust me.
  8. Decorate the top with washed, pitted, fresh cherries.
  9. Keep the cake refridgerated until ready to eat.

Tuesday, May 3, 2011

Un postre para Cinco de Mayo: Flan

Flan is probably the most familiar traditional Mexican dessert. Fans of French food would call Flan creme caramel (assuming their tongue doesn't get twisted on that sentence) and is a vanilla custard that is baked with its own caramel sauce. And unless my math is way wrong, this is not a terribly high calorie dessert (see note at the end).

I adapted this recipe from an old cookbook to make 6 individual desserts instead of one larger one and it is pretty easy and goes together fast. Well, not counting mastering the can opener. Yes, I'm a blonde. I can manage baking with a water bath but opening a can without electricity is beyond me. Go figure.

Ingredients
  • 1/3 cup sugar
  • 2 eggs
  • 1 13-oz evaporated milk
  • 1/4 cup sugar
  • 1 tsp vanilla**
  • dash salt
Directions
  1. Arrange 6 4-6oz custard cups (or ramekins if you're feeling extra-fancy) in a 9x13 baking pan and preheat the oven to 350. Set a teakettle to boil water. Or a medium-sized sauce pan when  you remember that you don't actually own a tea kettle (2 electric mixers, 3 sizes of muffin tins, about 20 cake pans, yes. Tea kettle, no. Logical explanation? No clue.).
  2. In a small sauce pan, cook the 1/3 cup sugar over medium heat until it melts. It will look like powder for what seems like forever and then all of a sudden you look away (and, you know, try to open the evaporated milk) and it is magically transformed into caramel.
  3. Distribute the caramel among the custard cups. it should just cover the bottoms of each.
  4. In a mixing bowl, combine the eggs, milk, sugar, vanilla, and salt with either a whisk or a mixer until well blended.
  5. Ladle the custard over the caramel in each cup through a fine-mesh strainer. The strainer will catch the odd jiggly bits of the eggs and any stray bits of vanilla bean. You could skip this, but who wants jiggly bits in their flan anyway.
  6. Place the 9x13 pan holding the custard cups on the center rack of the oven. Pour boiling water into the 9x13 pan but outside the cups (being really careful not to pour it INTO the custard cups...don't ask me why I mention that...I think I need to shop for a tea kettle).
  7. Bake about 40 minutes or until the custard is about as firm as jello when shook. Remove them from the water bath and cool.
  8. To serve, run a knife around the outside edge of each flan to loosen it. Invert on a plate allowing the caramel sauce to run over the top.
*Caloric math: By reading the nutrition facts on each of the ingredients, I get the following: evaporated milk (480) + 2 eggs (70 each) + 1/4 cup sugar (193) + 1/3 cup sugar (255) = 1068 for the whole batch. Divide by 6 and it's 178 calories per serving.

**My bottle looks suspiciously like Penzey's Mexican Vanilla, which I vastly prefer over anything from the supermarket (don't even talk to me about "imitation" vanilla), or even Penzey's own Madagascar vanilla (Yep, there's a difference. Go smell them). But I'll tell you a secret:  my vanilla is homemade. That, I suppose, is a post for another day.

Thursday, April 14, 2011

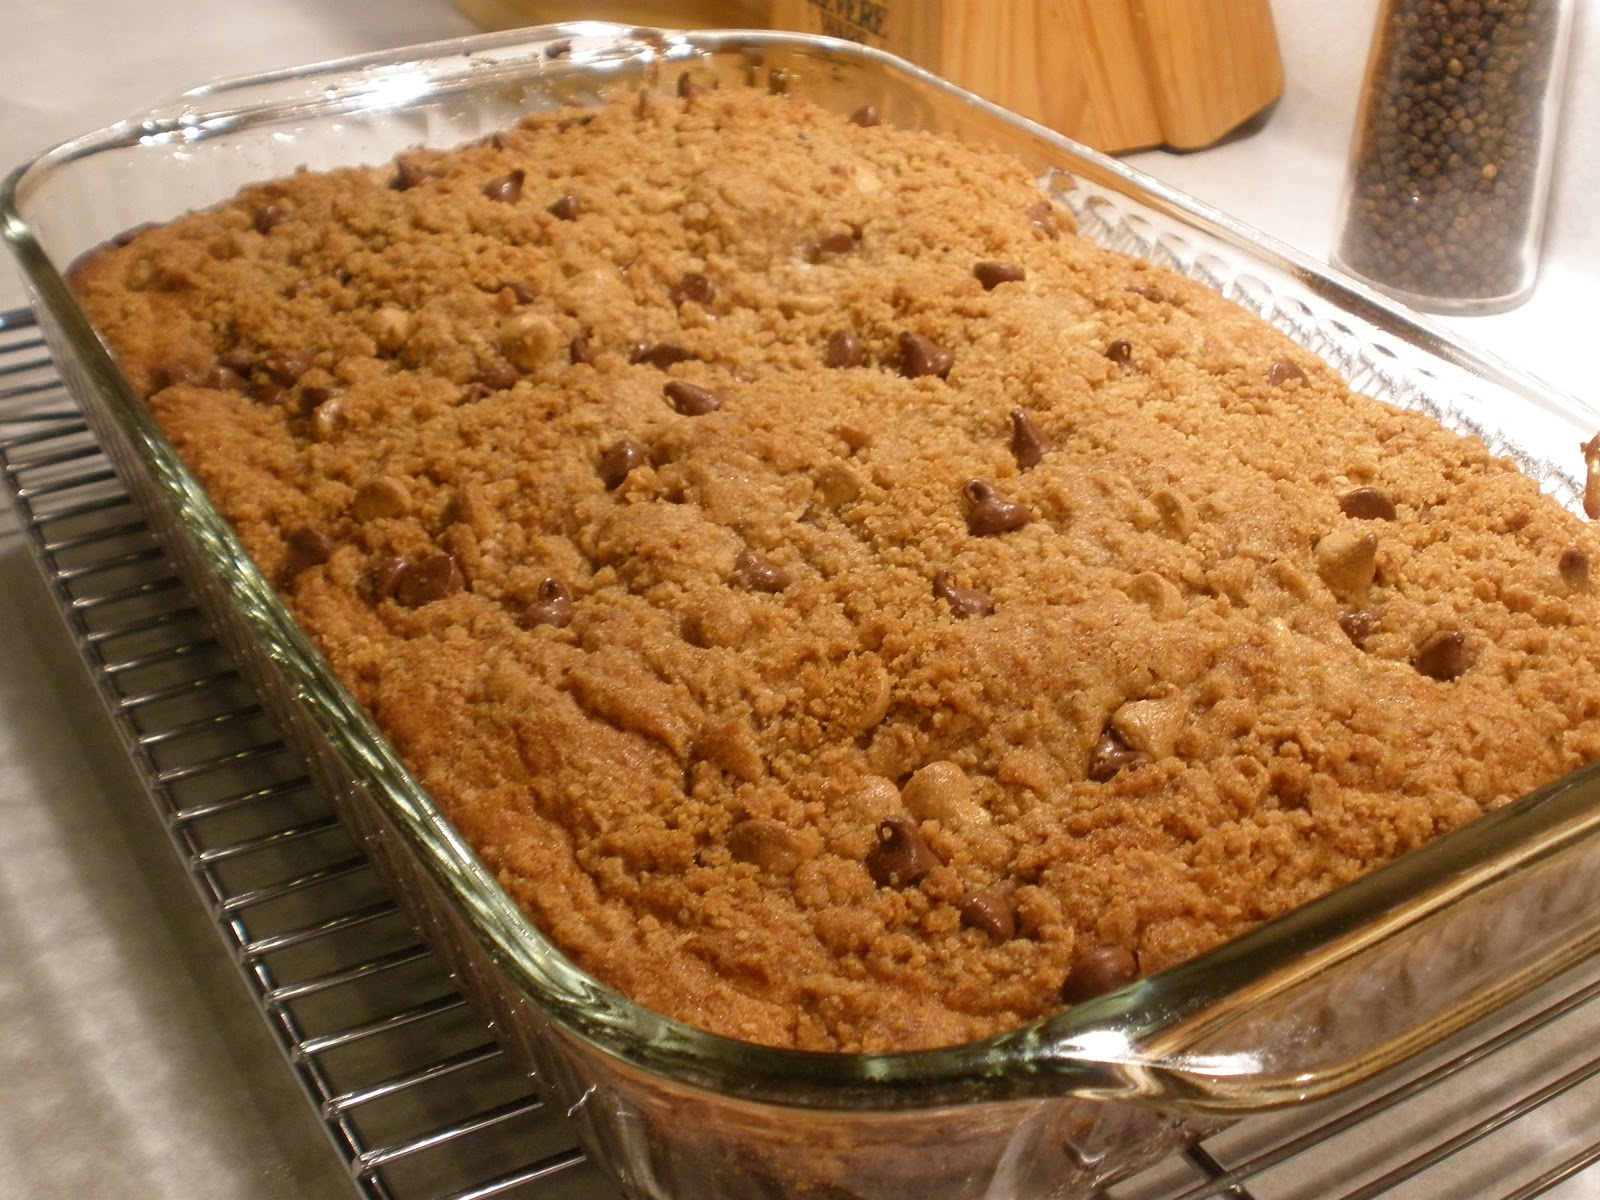
Peanut Butter Chocolate Chip Cake with Peanut Butter Struesel Topping

I'm only cheating a little. I swear. But it was my turn to bring a birthday treat to work for the April birthdays, and none of the other treat-bringers were planning a chocolate dish, and what is a birthday celebration without chocolate?

It was mostly peanut butter. Mostly. Lent will be over soon. And I have given myself dispensation to have chocolate for other birthday celebrations...


Topping Ingredients
  • 1/2 cup all-purpose flour
  • 1/2 cup packed brown sugar
  • 1/4 cup creamy peanut butter
  • 3 tablespoons butter, chilled
  • 1/4 cup chocolate and/or peanut butter chips (I had some of both on hand, so I used some of both)
Cake Ingredients
  • 2 cups all-purpose flour
  • 1 cup packed brown sugar
  • 2 teaspoons baking powder
  • 1/2 teaspoon baking soda
  • 1/4 teaspoon salt
  • 1 cup milk
  • 1/2 cup creamy peanut butter
  • 2 eggs
  • 1/4 cup butter, softened
  • 1/2 cup chocolate and/or peanut butter chips

Directions
  1. Preheat oven to 375. Spray a 9x13 baking pan with cooking spray.
  2. For the topping:
    1. In a small mixing bowl, stir the flour and the brown sugar.
    2. Using a pastry blender, cut in the peanut butter and butter until the mixture resembles coarse crumbs.
    3. Stir in about half of the chocolate & peanutbutter chips. Set the topping aside.
  3. For the cake:
    1. In a large mixing bowl (I used my stand mixer), stir the flour, brown sugar, baking powder, baking soda, and salt.
    2. Add the softened butter and peanut butter and blend.
    3. Alternate the eggs and the milk until the mixture is blended. Don't forget to scrape down the bowl if you don't have a fancy silicone paddle attachment.
    4. Beat the cake batter on medium speed about 3 minutes. Stir in the remaining chocolate and peanut butter chips.
  4. Spread the batter evenly in the greased ban and sprinkle the topping on top.
  5. Bake about 30 minutes until a toothpick inserted in the middle comes out clean.

Saturday, April 9, 2011

4 Ingredient Amaretto Cookies

I was in extreme need of a cookie and I had cake mix on hand. I have given up chocolate until Easter, but I have almond extract. Put these things together with a mixer and I have a very fast, very easy recipe that reminds me of our wedding cake. Perhaps I should have added a raspberry filling...

Ingredients
  • 1 boxed white cake mix
  • 2 eggs
  • 1/2 cup butter, softened
  • 1 tsp almond extract
Directions
  1. Preheat oven to 350. Line two cookie sheets with parchment paper or silicone baking mats.
  2. With an electric mixer, beat the cake mix, eggs, butter and almond extract until they form a soft dough.
  3. Form dough into 1 inch balls and space about 2 inches apart on cookie sheets.
  4. Bake about 9-12 minutes until lightly golden on the top and a toothpick inserted in the center comes out clean.
Makes about 20 cookies.

Sunday, March 27, 2011

Thomas the Train Cake

This is the last cake of our family Cake Week (the week of my birthday, my son's birthday, and my mother's birthday, plus up to two weekends on either side, wherein I tend to bake a LOT of cakes). Today we had a small kids birthday party for my son.  He requested a Thomas the Train cake.

I admit that I'm not the best cake decorator and I have a silly problem of preferring taste over appearance when it comes to food. These little train cupcakes might work really well with rolled fondant, but I'm not a fan of how the packaged stuff tastes (maybe someday I'll try making my own). I used a basic decorating frosting (shortening, butter, vanilla, powdered sugar).The dark brown frosting is chocolate leftover from the cupcakes I sent to preschool on his actual birthday.


This is actually the second Thomas cake I've made for him with this cake pan. I bought the a few years ago at a local small kitchen store. I think this is the same one on Amazon. There are other, Thomas-branded cake pans available too. Maybe next Christmas I will try using this pan with a gingerbread recipe and decorating the cars with candy...

If you don't over-fill the train cars, each one holds about one to one-and-a-half cupcakes worth of batter.  I, of course, overfilled the pan so we had to trim the bottoms of each of the train cars to make them stand up flat. I had enough batter left for half a dozen normal cupcakes, though had I not over-done the train I would have had nearly a dozen.

Also, for this cake I used a regular boxed Pillsbury cake mix, but I think the pan would work really well with a heavier poundcake or bundt cake recipe. The normal cake is tasty, but the detail on the cars is lost. Then again, the details on the cars is lost as soon as I slather it with frosting :)

Friday, March 25, 2011

Banana Bundt Cake with Caramel Latte Glaze

I need another dessert in the house like I need a 4-year old in the kitchen. In other words, I don't need need it, but it makes me happy on a very deep level.

I've had dessert on the brain the past few weeks. The trouble with giving up chocolate for Lent is that I then become obsessed by everything else that's bad for me. Cookies, cupcakes, leftover frosting, jelly beans...I have a feeling that Lent and bathing suit season are not complimentary for me this year :)

When looking for a way to entertain myself and my children on this snowy(!) March morning, I remembered the overly-brown bananas hiding behind a stack of papers on the counter. Banana bread is good, especially with chocolate chips, but I wanted to try something a little different. And my bundt pan has been neglected lately. So I'm entertaining it too.

Ingredients
  • 1 cup chopped walnuts
  • 2 1/4 cups all-purpose flour
  • 1 1/2 cups sugar
  • 1 1/2 tsp baking powder
  • 1 tsp baking soda
  • 3/4 tsp cinnamon (I used 1/2 tsp Ceylon cinnamon and 1/4 tsp Vietnamese Cassia from Penzeys)
  • 1/2 tsp salt
  • 1  cup mashed ripe banana (about 2 large bananas)
  • 3/4 cup buttermilk
  • 1/2 cup butter, softened
  • 1 tsp vanilla
  • 2 eggs
Directions
  1. Preheat oven to 350
  2. Grease a bundt pan. Sprinkle chopped walnuts in the bottom and set aside.
  3. Whisk together dry ingredients (flour, sugar, baking powder, baking soda, cinnamon, and salt). 
  4. With an electric mixer, add the butter, banana, buttermilk, vanilla, and eggs. Blend until no lumps remain (about 1-2 minutes on low).
  5. Pour into bundt pan over walnuts.
  6. Bake 35-40 minutes until a toothpick inserted in the top comes out clean.
  7. Let cool in the pan for 5 minutes then remove to a wire rack to finish cooling.
  8. Sprinkle cooled cake with powdered sugar, or top with Caramel Latte Glaze (below)
Carmel Latte Glaze
  • 1 tablespoon instant coffee
  • 1 tablespoon milk
  • 1 heaping tablespoon caramel ice cream topping
  • 1/2 cup powdered sugar
  1. Stir coffee, milk, and caramel in heat-proof bowl. Nuke about 15 seconds to help the coffee dissovle.
  2. Stir in the powdered sugar.
  3. Drizzle over cake

    Wednesday, March 23, 2011

    Chocolate Chip Ice Cream Cookie Cake

    So this one is not my best work. The concept was good--two layers of chocolate chip cookie sandwiching vanilla ice cream. But I think some of the details need improvement.

    I guess I should explain why I am making a chocolate chip ice cream cookie cake at all. This is what I refer to as Cake Week in our house. My birthday, my son's birthday, and my mother's birthday all fall within a 5-day span. Add in the sandwiching weekends and the assorted cake-eating occasions (celebrate with my in-laws, celebrate with just the immediate family, celebrate with my extended family, celebrate with the preschool, celebrate with the non-preschool kid friends), I get caked-out.

    My attempt at a cookie cake was (is) for the immediate family. The end result was extremely tasty, and it looked nice, but it had a few flaws.  Here is what I did:

    Ingredients
    • 1 recipe Nestle Toll House chocolate chip cookie dough. Yes, the one from the package.*
    • ~1 pint vanilla ice cream (you could use more, but I had less on hand than I expected).
    • Decorating frosting
    Directions
    1. Mix cookie dough according to the recipe.
    2. Spread in two greased, 9" cake pans and bake at 375 for about 20 minutes, until the center is done.
    3. Cool the cookies in the pans for about 10 minutes, then remove from the pans.  Cool completely.
    4. Freeze the cookies for an hour or two before filling.
    5. Soften the ice cream in the microwave on about 45-second bursts at low power until it is spreadable.
    6. Spread softened ice cream on top of one cookie, then top with the other.**
    7. Freeze stacked cake until firm, then decorate.***
    Where I went wrong:
    * I love the regular, boring, tried-and-true Nestle recipe, but I should have remembered that the cookies tend to crisp up when they cool.  Crisp cookies are hard to slice. Crisp, frozen cookies are nearly impossible to slice. Even with a sharp chef's knife.  If I do this again, I think I'd look for a more cakey recipe that is soft when cool.  Probably one without the real butter, which makes it tasty but crunchy.

    ** My second mistake was I should have topped one cookie with softened ice cream, then put it back in the freezer to firm up before topping with the other cookie.  Even pre-chilled, my cookie layers worked like slabs of styrofoam and kept the icecream filling from freezing up firm.

    *** This is not so much an error as something I feel compelled to explain. I love to bake, and I decorate cakes and cookies. But I'm not really into the decorating thing. I spend more energy on the taste and preparation of the finished product than on the looks. Part of me just doesn't have the patience for all the detail work, and part of me really prefers to make food that is NOT too pretty to eat. I want my food consumed, not left un-cut on the buffet table. And my decorating style (which this time included store-bought cake candies and chocolate frosting leftover from the preschool cupcakes) totally reflects it :)

    Friday, March 11, 2011

    Guest Chef

    I have wanted to try my hand at making a traditional Mardi Gras King Cake for a few years now. They're sort of a yeast coffee cake or a filled brioche, baked in a ring sometimes with a small ceramic baby baked inside. I see them every year in the grocery stores and they're usually OK Frequently they're a little dry and overly sugary because they bake them in bulk days in advance and coat them in yellow, green, and purple sprinkles.

    Last weekend I hunted around for a recipe to start from and found a likely looking one on King Arthur Flour's website. They have an awesome library of recipes, btw. The photo looked pretty good but I had one thing I planned to change: the filling. It's a cream-cheese based one and I am not a fan of cream cheese.

    (Its true! I don't even care for cheesecake, though some are passble. Usually the ones that don't taste like cream cheese.)

    Anyway, I tried two or three times one day to print the recipe and experienced technical difficulties. Then I ran out of time for an extra shopping trip for powdered milk and a better filling.  So we made pancakes.

    On Thursday, my husband got sick-kid-duty and had some time on his hands while I was at work. He fixed my printer technical difficulties. Turns out, it was out of paper. Doh. BTW, I'm not usually technically challenged, just blonde :) He loaded up paper and out came three copies of the king cake recipe.  So he baked it for us for dessert. (He made dinner too...he's mine, btw, and I don't plan to share him).

    We still had no cream cheese in the house, nor did I ever buy that powdered milk. He apparently made do without the extra milk powder, and filled the cake with frozen strawberries. 

    BTW, it was every bit as yummy as in the picture. And yes, the cake did appear to be bleeding strawberry syrup in places. That is what I consider a feature, not a flaw.

    Without all the extra colored sugar on top, and filled with fruit, this does actually make a good yeasted coffee cake, not too sweet, suitable for breakfast or afternoon snack.

    Saturday, February 26, 2011

    Baked Chocolate Donuts

    Ingredients
    • 7/8 cup unbleached flour (1 cup minus 2 tablespoons)
    • 1/2 cup sugar
    • 1/4 cup cocoa powder
    • 1 tsp baking powder
    • 1 tsp instant coffee
    • 2 large eggs
    • 3 Tbsp vegetable oil
    • 2 Tbsp milk
    Directions
    1. Heat oven to 375. Grease a donut pan.
    2. Whisk dry ingredients in one bowl.
    3. Beat eggs together in another bowl. Whisk in oil and milk
    4. Blend wet ingredients into dry. The batter is thick, somewhere between muffin and cookie dough.
    5. Spread evenly in donut pan. (I got 10 out of 12 openings filled but I didn't try to re-distribute the batter.)
    6. Bake 12-15 minutes or until a toothpick inserted in the center comes out clean. Serve glazed, dipped in butter and powdered sugar, or plain.
    Basic Cocoa Glaze
    Mix 1 cup powdered sugar, 2 Tbsp cocoa powder, and about 2 Tbsp milk until smooth. Drizzle over donuts or pour into a shallow bowl and dip the tops of the donuts.

    Thursday, February 24, 2011

    Triple Chocolate Pancakes

    Pancakes are good for more than just breakfast. Like dinner. And dessert. And they are extremely easy to make as a variation on my basic pancake recipe.

    This is also a great way to sneak in extra fiber into your diet. Just replace 1/2 of the regular flour with whole wheat. With all that chocolaty yumminess, you'll never notice :)

    Ingredients:

    • 1 cup all-purpose flour (or 1/2 cup all purpose + 1/2 cup whole wheat flour)
    • 1/4 cup cocoa powder 
    • 3 Tbsp sugar
    • 2 tsp baking powder
    • 1/4 tsp salt
    • 1 egg
    • 1 cup milk
    • 2 Tbsp butter, melted and cooled
    • Chocolate and white chocolate chips
    Directions:
    1. Heat a griddle or skillet. For an electric griddle, follow the instructions. I set mine to 325, or a skillet to medium heat. 
    2. In a large mixing bowl, combine all of the dry ingredients (not including the chocolate chips) with a whisk and set aside.
    3. In a second bowl, whisk all of the wet ingredients together, making sure to disperse the egg. The liquid should be pale yellow
    4. Add the liquid to the dry ingredients and stir with  a spatula until the batter just comes together. There will be lumps, but they shouldn't be huge. 
    5. Pour batter onto your hot griddle/pan.
    6. Before the top sets, sprinkle chocolate chips onto the cooking pancakes. 
    7. Cook until the top side looks almost dry. Then flip with a spatula and cook until the other side is a light golden brown.
    Makes:
    About 8 4-6" pancakes. Serve with whipped cream, chocolate sauce, warmed raspberry jelly, or just a fork.